The Electronic Signature is an optional feature within the LMS. This feature can be used for instances when the user needs to sign off on a policy or procedure (documents that re viewed within the LMS). When the electronic signature is enabled, users will be required to accept of decline (exit the course without completion) the policy or procedure after viewing it online.
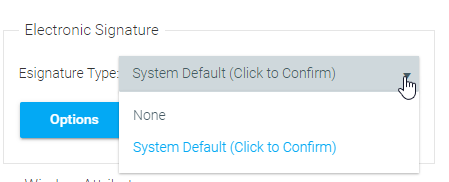
Go to Resources > Maintain Learning Resources. Search for the resource you want and click the Edit button. On the On-Line tab, use the Esignature Type drop-down to select System Default (Click to Confirm).

This feature will only be available if the Type of Resource field is set to "On-Line Training/General".
Next, click on the File Manager button in the top toolbar and upload the file users should view and sign off on. Once the file has been uploaded, select the file, click the Set Starting Link button, and close the File Manager.

Please ensure that the name of the uploaded file does not contain the following special characters: \ / : * ? " < > | & #
If the uploaded file name contains these characters, users may experience a blank black screen when they launch the file.
In the Resource Links section of the On-Line tab, the launch link should now be shown in the Location field.
Under tracking Options, set the Compliance Model to AICC and the Score Model to The resource will score itself as complete.

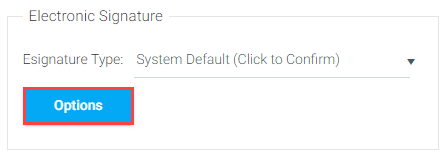
Once the Electronic Signature is enabled, you can click the Options button to change the confirmation text for the resource, if you wish. The confirmation text will default to the system-level text if no changes are made here.

Click on the Options button and the E-signature pop-out box will appear.

You will have the following options:
Import Settings from Another Course
This allows you to select another course that has the desired electronic signature options entered and essentially copy those options into this course.
Content Tab > Text for Confirmation Button
The text that should appear on the confirmation button
Content Tab > Text Box
The text that should initially appear in the left panel
Confirmation Tab > Text for Exit Button
The text that should appear on the Exit button
Confirmation Tab > Text Box
The text that should appear after the user has clicked the Confirm button
All of the above text can also be set at the system level through the custom text editor. To easily find each of the fields in the custom text editor, search by label and type "esignature" in the search box.
When a document has the Electronic Signature enabled, the document will display in a panel on the right side of the screen, while confirmation text will appear on the left side of the screen. The confirmation text can be customized at both the system and resource level.

Once a user clicks the Confirmation button, they will see confirmation text that informs them that their response has been recorded and the course will move over to their Learning History.

If a user chooses to exit the course without clicking the Confirmation button, the course will remain incomplete on their Learning Plan.
The Enhanced Electronic Signature Configuration option adds an extra layer of security by requiring a user to enter their User Name and Password before the course is moved to their Learning History. If desired, this configuration option should be selected when the electronic signature feature is initially added to the LMS.
